Wednesday, May 28, 2014

X Week

We had an eXceptional X week!  As we are nearing the end of the alphabet, it is getting harder to come up with crafts and activities.  I mean, there are only a few common words that start with the letter X.  I did incorporate some words in this week’s lessons that didn’t actually start with the letter x, but all of the words still helped Brooklyn learn the x sound better. With that being said, we did some pretty fun stuff this week!  

On Monday, Brooklyn made a xylophone shaped like an X.  I cut four different colored strips of paper in different sizes.  Before Brooklyn glued them onto her x, I had her arrange them from biggest to smallest.  She then glued them on and added some little screws with a black marker.  She also did her x dot picture and practiced writing x’s.  

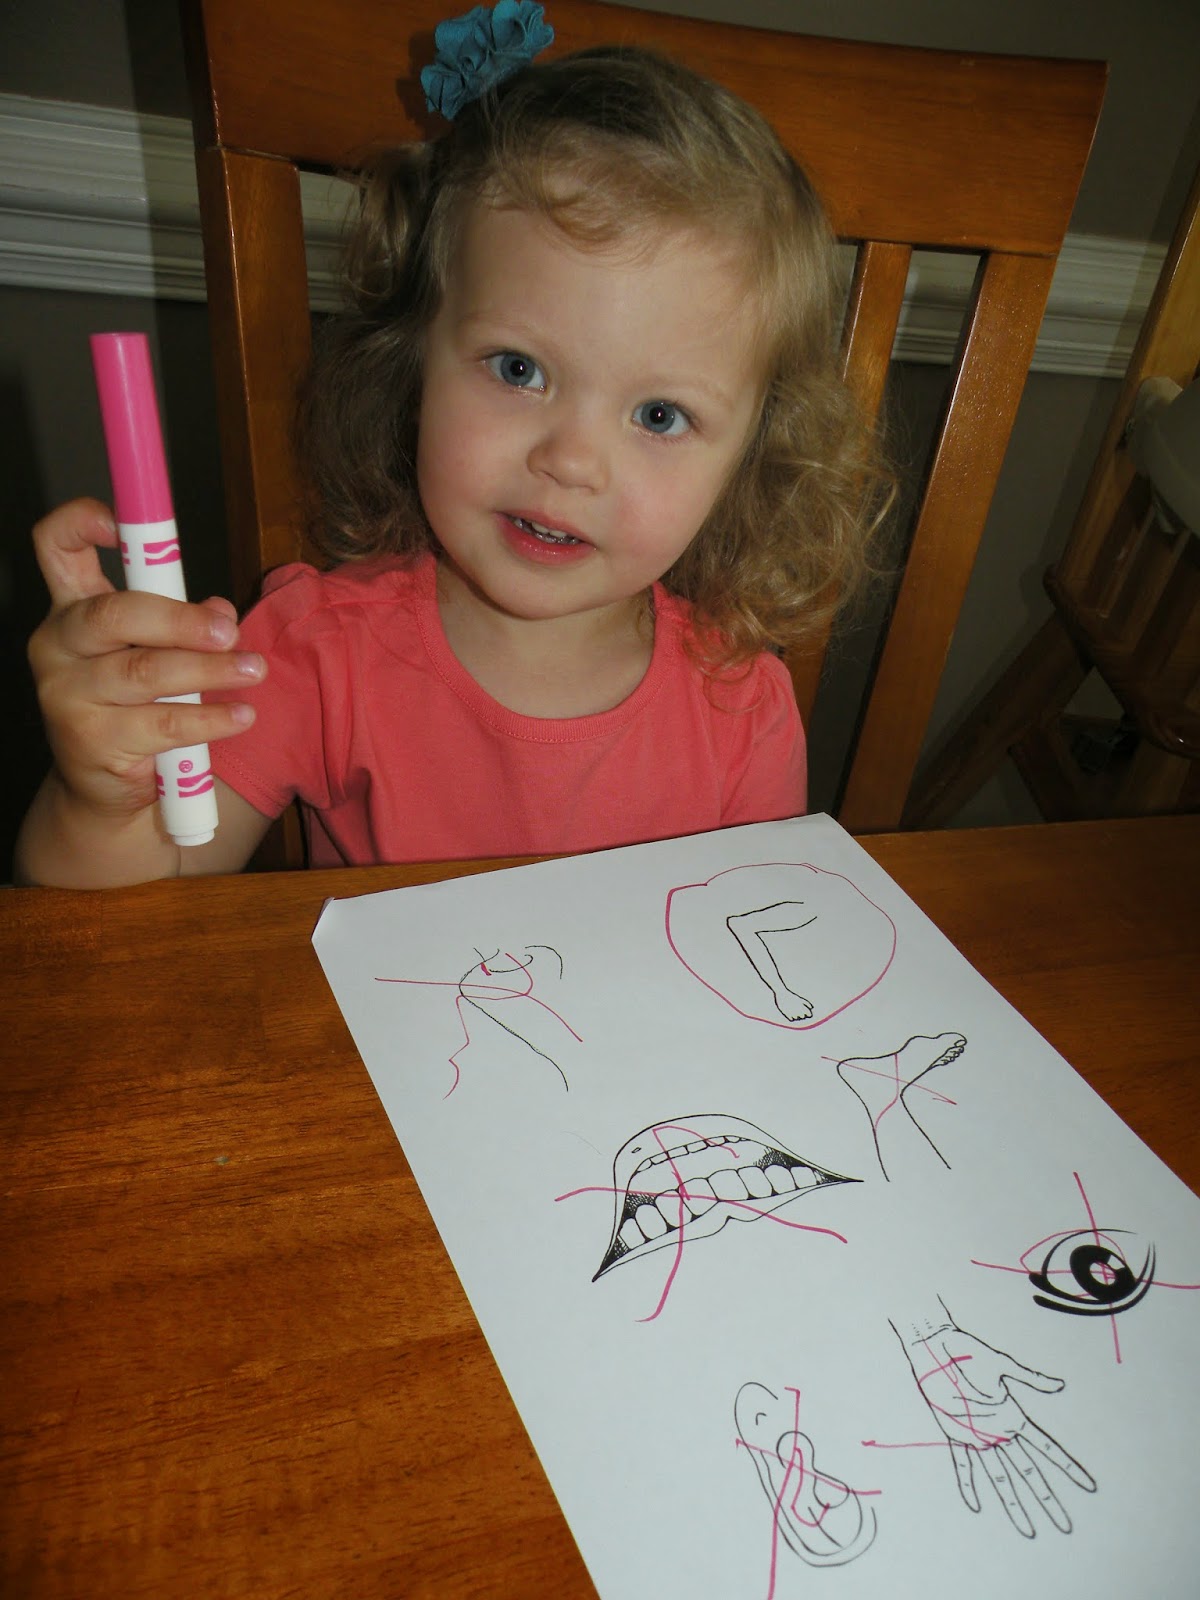
Tuesday was lots of fun as we talked about x-rays.  I showed Brooklyn some pictures of x-rays on the computer, and we talked about our bones.  We did a really cool craft where Brooklyn made her own x-ray of her arm and hand.  I got the idea from this website.  I traced Brooklyn’s hand and arm on a paper towel and let her use Elmer’s glue to draw bones inside.  Brooklyn then placed another paper towel on top and smoothed it out (to glue the two paper towels together).  I used a little bit of black watercolor paint in a small bowl of water to make the “x-ray ink.”  I placed the paper towels on a cookie sheet to keep the mess contained.  Brooklyn used a big paint brush (because I didn’t have a dropper - either will work fine!)  to paint/drip the black paint/”ink” over her x-ray to reveal her bones.  We then let it dry overnight.  There are so many fun x-ray crafts out there, and even though this one was a little messier and more time consuming than others, it was so much fun!  Once Dr. Brooklyn saw the x-ray of her arm, she continued playing doctor and did an eXam on her patient.  I printed out this page and gave it to Brooklyn, along with a marker.  I read off the exam list (in the lesson plans), and Brooklyn x-ed out the body part that went along with each clue.  In the end, she discovered that her patient had a hurt arm.  This was also a good way to practice writing x’s.


Dr. Brooklyn examining her patient 

Wednesday was MOPS.

Brooklyn made a xylophone painting on Thursday. I made four mallets by hot gluing pom poms to the end of straws (I was planning to use lollipop sticks but couldn’t find them so I used straws instead.  When using straws, be careful - the hot glue will melt them.)  Before she did her painting, she practiced playing her X xylophone that she made on Monday with the mallets.  I then gave her red, green, blue, and yellow paint - the same four colors of her four mallets.  She matched each mallet to its same paint color then one by one dipped a mallet in the paint and pretended to play a xylophone by gently banging the mallet all over the paper.  She had lots of fun making her colorful painting.  


Her xylophone painting
On Friday I told Brooklyn the story of Jesus dying on the cross for our sins.  We talked about Jesus’ love for us even when we do bad things.  We then made a crucifixion painting.  I used tape to make three crosses on a piece of paper.  I then let Brooklyn finger paint the entire piece of paper in the colors of her choice.  When she was finished, I removed the tape to reveal the three crosses.  

For details and instructions of these crafts and activities, please click to see my lesson plans.  If you have more ideas for the letter X, please comment and share - I would love to hear them!!

Tuesday, May 20, 2014

W Week

We loved talking about the weather all week while we were learning about the letter W.  Brooklyn really enjoyed singing The Weather song every day as we talked about what kind of weather we were having that day.  Since the weather was beautiful most days this week, we enjoyed doing our circle time songs while swinging in the backyard almost every morning.  We also observed some worms while playing in the backyard, although my cautious little girly girl wasn’t too interested in getting too close!  

Brooklyn glued together her whale W picture - complete with water shooting out of his blowhole on Monday.  She also practiced writing W’s and did her dot W picture.  Lately, M’s and W’s have been her favorite letters to write!

On Tuesday, Brooklyn made her watermelon craft.  I cut a half circle out of white paper and drew a 1 inch border around the rounded edge of it.  I first gave Brooklyn green paint and a paintbrush and told her to only paint the outer edge to make the rind of the watermelon.  Next, I have her red paint and a sponge and let her sponge paint the inside of the watermelon.  Once it was dry, I gave her a black marker and let her add seeds to complete her watermelon.  


We had fun picking strawberries on Wednesday!

Brooklyn really enjoyed Thursday’s window craft.  I let her pick two different colored papers to use for her house - she chose pink and yellow.  I used the pink one for the house and started by cutting the top of the paper to make a roof.  Next, I cut four windows in the house.  I let Brooklyn glue her house of windows to the piece of yellow paper - making sure not to glue the windows.  I asked her what/who she wanted to draw in each window, and she chose to draw mommy, daddy, Madelyn, and herself in each of the windows.  Finally, she added some stickers to decorate her house.  Later, we went through our house and counted all of the windows.  


On Friday, I told Brooklyn the story of the woman at the well.  We talked about how the woman was very thirsty just like we get thirsty sometimes, but what she really needed Jesus.  We talked about how we need Jesus just like we need water to drink and food to eat.  Brooklyn then colored the picture of the woman at the well.

For details and instructions of these crafts and activities, please click to see my lesson plans.  If you have more ideas for the letter W, please comment and share - I would love to hear them!!

Thursday, May 15, 2014

V Week

We took a couple of weeks off of school around Easter for a little spring break and a week of Easter crafts.  Once again, getting back into the swing of things after taking a break was difficult (especially with the nice weather again!).  We only ended up doing three days of activities out of the five I had planned - but we still had lots of fun!  On our “Vacation” themed day we were able to incorporate many different activities which made up for some of the ones we missed.  I spent lots of time preparing, and Brooklyn and I spent an hour or more enjoying the different activities at each stop on our pretend vacation.  It was also fun to sing our Vacation song and pretend to travel on different forms of transportation along the way.  

Monday was typical with the introduction of the letter v and the song, poem, and verse that went along it.  Brooklyn glued together her vase full of violets and practiced writing v’s on the chalkboard.  

Tuesday we talked about vegetables.  I used some of Brooklyn’s pretend food from her kitchen to show her which ones are fruits and which ones are vegetables.  We talked about the different ways vegetables grow - some grow underground and others grow above the ground on a plant.  I then gave her a print-out of different vegetables that she colored.  As she colored, we talked about what color they usually are.  In the original instructions for the craft, it says to use two paper plates.  I decided to cut large circles out of construction paper instead.  I cut three large circles, all the same size, one was blue, one brown, and I let Brooklyn choose the other color - she chose orange.  I then let Brooklyn cut the blue circle in half and glue it to the top half of the brown circle to create the sky (the brown represented the ground).  After cutting each of her vegetables out, we talked about where they grow, and Brooklyn glued them either underground or above ground.  Once all of her vegetables were in place, I cut the orange paper in half (to match the skyline that Brooklyn had cut).  I placed a brad on the edge of the circle to attach the top and bottom of the orange paper to the sky and ground paper.  I then labeled the top half “above ground” and the bottom half “underground.”  Later, as Brooklyn ate some carrots with her lunch, we talked about the benefits of eating lots of yummy vegetables.  


We had MOPS on Wednesday.

Thursday was our big Vacation day.  I started by having Brooklyn color each of the six vacation signs and cut them out (she always loves cutting!).  Next, we made a vest.  I cut a paper bag to make the vest then used some of the extra paper to tape on a pocket.  For some reason Brooklyn was scared of the vest and didn’t want to touch it.  I was planning to have her decorate it and then wear it for our vacation so she could put the signs in her pocket as she collected them.  Oh well, things don’t always go as planned!  Next, I had her play by herself for a few minutes while I set everything up around the house.  Once everything was ready, we sang the vacation song and pretended to zoom like an airplane to our first stop.  Brooklyn was instructed to find the signs in order from numbers 1 - 6.  Several times along the way, we would stop and read out the numbers she had collected so far to see which one was next.  Here’s how I set it up and what we did at each stop.  Stop 1 was the violin.  I placed the sign beside a stick and when we arrived, we pretended to play our pretend violins and make music.  We sang along as we played.  Stop 2 was a volcano.  I placed the sign beside a volcano experiment (I used brown paper to form a mountain around a small bowl with baking soda inside.  I put it on a cookie sheet and placed a measuring cup full of vinegar beside it for Brooklyn to pour inside to make a volcano erupt).  We visited “Hawaii” and watched a volcano erupt.  Stop 3 was vegetables.  I placed the sign beside a play basket and had placed vegetables around on the floor for Brooklyn to collect in her basket.  We had fun visiting a “garden” and picking some fresh vegetables.  Stop 4 was a vineyard.  I placed the sign beside a bowl of grapes in the kitchen.  We talked about how grapes grow on a vine and pretended to sit in a vineyard as Brooklyn enjoyed her grapes for snack.  Stop 5 was violets.  The sign was on the back door.  We went outside and picked some flowers (we pretended like they were violets).  Our last stop, stop 6, we were back at home and had to vacuum up a messy house after a busy vacation.  We finished up our busy school day by stringing the six signs together to make a scrapbook of our vacation.  
Making her volcano erupt 
She picked lots of yummy vegetables
Stopping at the vineyard to eat her grapes
Brooklyn's vest with her cards in the pocket (even though she wouldn't put it on).


For details and instructions of these crafts and activities, please click to see my lesson plans. If you have more ideas for the letter V, please comment and share - I would love to hear them!!

Monday, May 5, 2014

U Week

The most common U word I can think of is umbrella.  Umbrellas are so much fun, and kids always seem to love holding them while walking in the rain.  I was hoping for at least one rainy day during U week, but instead we had absolutely beautiful weather the whole week.  I can’t complain about that though!  We did pretend like it was raining and played with umbrellas outside anyway.  Brooklyn loved our Umbrella Song and poem, and we enjoyed pretending to be an umbrella while singing and dancing around.  Since the weather was so nice this week, we did our circle time activities and songs outside most days.  My girls love to swing and that always provides a great time to practice counting, spelling their names, and singing songs.


On Monday I introduced the letter U and Brooklyn did her U dot picture.  Of course her U picture was an umbrella, which she enjoyed gluing together.  


On Tuesday we talked about things that live underwater.  We talked about fish, seashells, whales, dolphins, seaweed, and other ocean creatures.  We watched a couple of youtube videos of underwater life.  I printed out a page of underwater creatures that Brooklyn colored with her do-a-dot markers.  Brooklyn also finger painted a light blue piece of paper with dark blue finger paint to make an ocean.  Once everything was dry, I cut out the underwater creatures, and she glued them into her ocean.  


Wednesday was our umbrella day.  I gave Brooklyn a coffee filter and some water color paints and let her cover the coffee filter with lots of beautiful colors.  Once it was dry, she folded it in half, glued it together, and glued on a handle to make an umbrella.  For snack, we made an umbrella using half of a Babybel cheese and a small piece of a bendy straw.  


Thursday was such a beautiful day outside!  We decided to spend the morning at the park, and we even packed a picnic lunch.  We never got around to doing school.


I had a hard time coming up with a Bible lesson for the letter U.  After much research, I found the story of King Uzziah who is mentioned in 2 Chronicles 26.  As I read about King Uzziah, I was challenged myself to always rely on God and give Him the glory for what He does in my life.  It is very easy to take credit for the things I accomplish in my life (especially when everything is going good).  I must remember that God is enabling me and empowering me with His strength - not my own - and always remember to thank Him for working through me.  I told Brooklyn about how King Uzziah loved God and how God blessed him.  King Uzziah had lots of things, did a lot of good things, and became very well liked and very powerful.  He started to become prideful and stopped being faithful to God.  Because of this, God gave him leprosy which caused him to have to live by himself and lose all of his power.  King Uzziah stopped relying on God and started relying on himself.  He started thinking he could do things on his own and stopped thanking God for helping him.  What a good lesson that we all can learn from.     


For details and instructions of these crafts and activities, please click to see my lesson plans.  If you have more ideas for the letter U, please comment and share - I would love to hear them!!

Sunday, April 20, 2014

Brooklyn's 3rd Birthday Party

                 I can't believe my little Brooklyn is already 3 years old!!  Where have the years gone?  Her absolute favorite movie is Mary Poppins, which she refers to as "Mary Hoppins."  It is the only movie she will sit through.  She knows at least some parts to all of the songs and is constantly going around singing "let's go fly a kite, up to the highest height..." or "it's a jolly holiday with Mary, Mary makes your heart so light..."  For several months, every night before bed, Brooklyn would have a Mary Poppins dance party in her room.  She would give us all props to hold for each song and direct us where to stand and how to dance.  She is very creative in her props - a dirty sock was often used for a kite or an empty water cup for a chimney sweep.  So many good times have been had and memories made as our family sang, danced, and marched around Brooklyn's room singing Mary Poppins songs each night.  So as Brooklyn's 3rd birthday approached, I knew there was only one theme that would make sense for her party - Mary Poppins!!  As I began to search for ideas and listen to the soundtrack over and over to get inspiration, I began to fall in love with Mary Poppins too. This party was so much fun to plan, and I hope Brooklyn enjoyed it!

          I decided to make my own invitations using a blank template on Greetings Island.  I used clip art of Mary Poppins and Bert along with a cute quote from the movie.  I printed the invitations on thick, textured yellow cardstock.

          I made all of the decorations using scrapbook paper, ribbons, and poster boards.  By planning ahead, I was able to watch for those supplies to go on sale; so ultimately, I spent very little money (just lots of time).  Since it's springtime, I decided to focus on kites as a major theme for the party.  Brooklyn was also excited about that because "Let's Go Fly A Kite" is probably her favorite Mary Poppins song.  Next, I came up with the color scheme.  I had found a couple of yellow tablecloths on clearance at Target, so I knew that would be one of my colors and went from there. I decided on red, blue, and black for my other colors and picked four different patterned pieces of scrapbook paper in these colors to use.  I bought several of each piece of paper and used these in every decoration I made to tie everything together.   I especially liked the idea of using striped paper to mimic the stripes in Bert's vest in the movie.  I first made two big kites to hang over the food table.  I used all four of the patterned papers in each kite.  I also purchased four spools of ribbon - one yellow, one red, one blue, and one red and white stripes (which I used for the favors only).  I made tails for the kites by taping on a piece of ribbon and tying two little bows onto the tails.  After making these kites, I decided to continue the kite theme for Brooklyn's birthday sign.  I used three pieces of the black poster board to sketch out a London skyline which I cut out and taped together - this was the backdrop for the food table.  I used the extra poster board to cut out a silhouette of Mary Poppins and the letters for the birthday sign.  I hung the birthday sign kites over the skyline along with Mary Poppins floating with her umbrella in the sky.  Finally, I typed up signs for the different game and activity stations throughout the backyard.  I found movie quotes to go with each game and added that to the signs.  I glued these signs onto the same scrapbook paper to add some color.  To make each station more noticeable, I tied a red balloon to each sign.

           We were blessed with absolutely beautiful weather the day of the party!  As the guests arrived, they were directed to our backyard by a "Mary Hoppins" hopscotch board written in sidewalk chalk.  (This was not a movie reference.  It was inspired by Brooklyn's pronunciation of the movie title.)


 There were several games and activities to keep the children entertained.  I set out sidewalk chalk that the children could use to make their own chalk scenes to jump into - just like Bert does in the movie.


Once all of the children had arrived at the party, we started off my doing a horse race.  I had set up several small jumps using some old wood and bricks.  The kids took turns galloping over the jumps on a stick horse.


After they completed the race, they were directed to the tuppence toss.  I had originally planned to give the kids tuppence (plastic coins) as their prize for winning the race.  They would then try to toss those tuppence  into cornhole boards; however, we ended up just using beanbags.


The birthday girl having fun at the
Tuppence Toss


Next is was time to eat!  I tried to come up with as much Mary Poppins themed foods as I could. Here is the menu:

  • A Spoonful of Sugar - plastic spoons dipped in white melting chocolate and sprinkled with sugar       sprinkles
  • Chimney Sweeps - big marshmallows on sticks dipped in black melting chocolate and sprinkled with black stick sprinkles
  • Umbrellas - Babybel cheese cut in half with a bendy straw (cut very short) for the umbrella's handle
  • Strawberry Cupcakes - I used this recipe for the strawberry cake and this recipe for the icing 
  • Fresh Fruit - orange slices
  • Tuppence Cookies - chocolate chip cookies
  • Cheese and Crackers
  • Chips
  • Raspberry Ice - fresh squeezed lemonade with raspberry ice cubes (I just froze whole raspberries in water in an ice cube tray)

I also made Jane and Michael's Candy Apples by using a melon baller to scoop out tiny apple balls which I then dipped in melting chocolate and rolled in colorful sprinkles.  At least that is how I practiced making them earlier in the week.  However, Matt had suggested that I try dipping them in melted caramel instead of chocolate which seemed like a good idea.  I never practiced the apples this way to make sure they would work (which was my mistake) and quickly prepared them right before the party started.  Sadly, when I went to get them out of the refrigerator to serve them, I realized that the caramel didn't harden around the apples like I thought it would.  I decided that the big platter full of melted caramel with some apple balls on top wouldn't make the best addition to the food table.


After we ate, Brooklyn opened her presents.  She got lots of fun things!  Thanks everyone :)


We ended the party with a kite craft.  I had spent lots of time preparing the pieces for the kites before the party so during the party, I would be able to assemble them quickly.  I followed the directions on this website for the most part.  Because I didn't have paper bags, I bought a roll of brown craft paper (they have this at the Dollar Store).  I also bought wooden dowels (I used 3/16" by 36") and string.  I cut the dowels so that I was left with two pieces - one was 21" and the other was 15".  I found the center point of each piece and made a cross which I tied together with the string.  Next, I laid my cross frame onto my paper and traced a diamond/kite shape - leaving extra room at the top and bottom (to glue on my pockets) and drawing the triangles off to the sides (like it shows on the website).  I cut out the pockets for the top and bottom of the kite and went ahead and glued the bottom one on completely and glued the top one on halfway.  I left that one side open so that once the kids decorated their kite, I could easily slide the frame in and tape it together.  I then added my kite strings which I taped and wrapped around empty toilet paper rolls.


During the party, the kids decorated their kites with markers, picked between a few different colored streamers for the kite tails, then brought their kite to me to assemble.  I simply inserted their kite frame, added a few pieces of tape, and they were ready to go fly their kite!


So....these kites weren't the best flying kites, but they were fun to run around with.  As soon as I gave Brooklyn her assembled kite, she took off running through the yard with it singing "let's go fly a kite, up to the highest height, let's go fly a kite and send it soaring...."  That made all of the time I spent working on preparing those kites worth it!

As the kids left the party, they received "Bert's bit o' magic chalk" as a thank you for coming to Brooklyn's party.

What a fun day!  Happy 3rd Birthday to my sweet Brooklyn!!